RAW conversion applications like Adobe Lightroom are often the first place that color grading begins. One incredibly useful tool that tends to be forgotten about is the Color Tool.
In this video tutorial by Matt Kloskowski, you will learn how this tool varies from the other color-manipulating methods within Lightroom and Camera RAW.
To start, it’s worth noting the differences between the White Balance sliders and using the Color Tool.
In the example below, there is a portrait that has had warmth added to the image using the Temp slider on the left, with the Color Tool on the right. As explained in the video, the White Balance tools not only affect the temperature and tint, they also make the image brighter, and tend to remove the midtones of a photograph.
RELATED: Demystifying the HSL Tool in Lightroom
It doesn’t take long to see how tones tend to get pushed too far when using the White Balance tools.
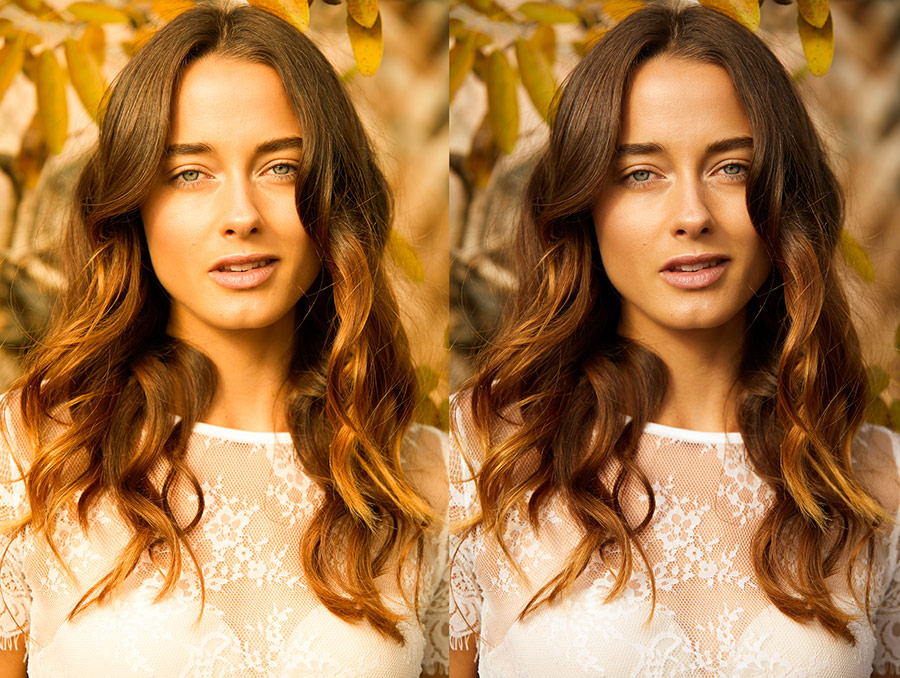
Left: +40 on the Temp Slider | Right: Yellow with the Color Tool at 40 Saturation
The right side of the example image was warmed using a Graduated Filter (applied to the entire image), with the Color Tool set to a yellow hue with about 40% saturation. While you can certainly apply less of the Temp slider to warm an image effectively, the impact it has on the grays of your photograph may be more than you wished for, making the Color Tool a fantastic option.
Whether you are color correcting a set of images or replacing color throughout, experiment with a variety of photographs to see how applicable this tool will be for your workflow.
Source: Matt Kloskowski | Image Source – Photo: Kendra Paige | Model: Ellinor Sandborg @ Elite Miami | Beauty: Miki Sarroca | Hair: Dania Gazzalla | Styling: Fab Amoré | Assistant: Chris Brodsky


