

A typical issue that photographers face when capturing digital images is limited dynamic range of DSLR cameras. We always have to choose between which detail we would like to keep, and which detail will unfortunately be lost.
If you choose to expose for the highlights – the shadow detail may be compromised. Likewise, if you choose to expose for the shadows – the highlights may get overexposed and you’ll end up capturing no detail in the brightest parts of the image.
This is a quick tip that will show you how you can enhance and retain the light and dark information within an image.
Typically this is used for landscape photography, however can be applied to any type of image. This technique enables you to adjust the contrast of the scene to try and reflect your initial vision, to show “why” you decided to capture this image in the first place.
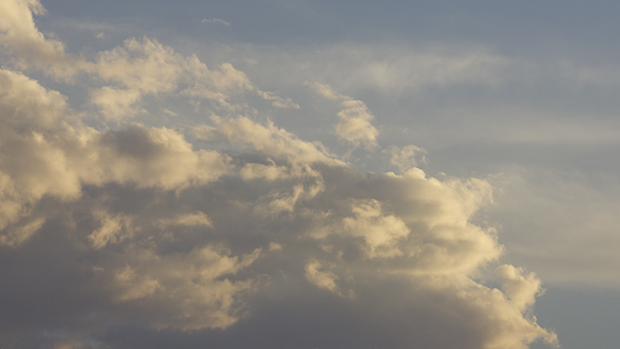
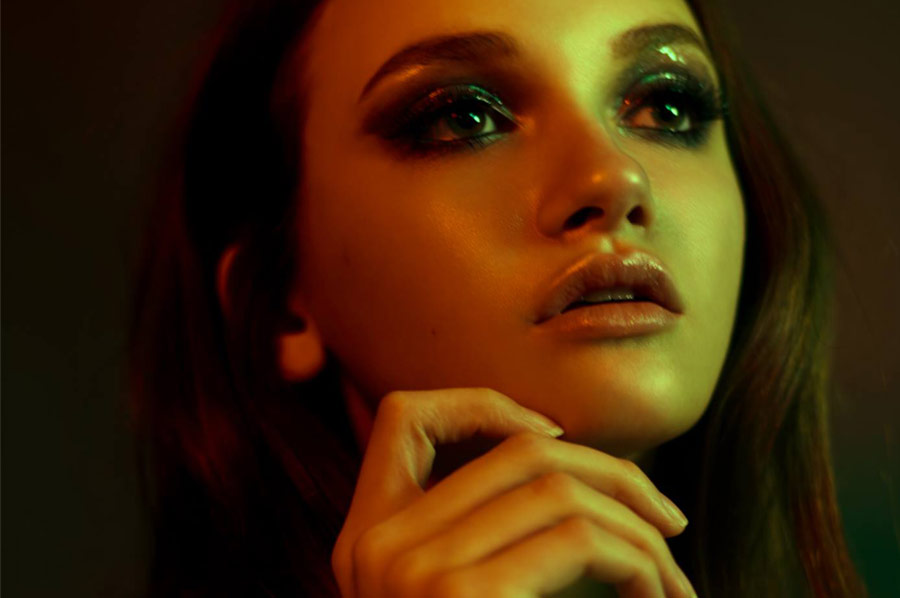
BEFORE:
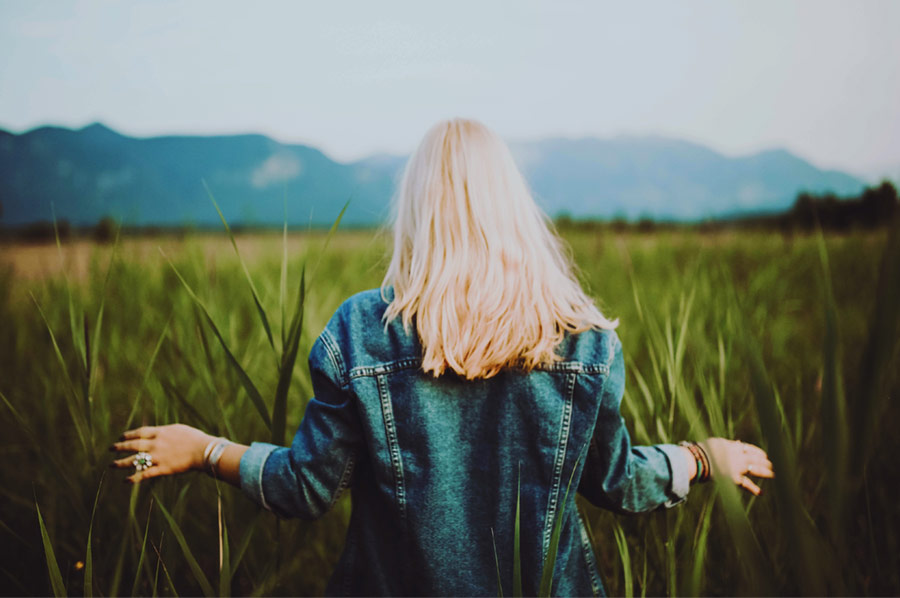
AFTER:

Feel free to download and view the PSD file of the photo above from here.
Follow these steps to add contrast and drama to your image:
1. Duplicate your background layer: press Ctrl + J or Command + J on a Mac.
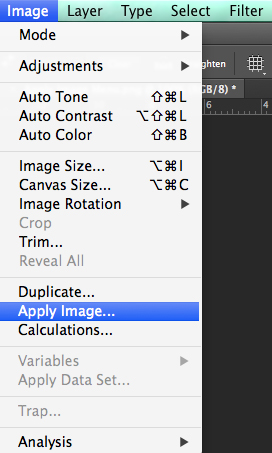
2. Select “Apply Image…” from the Image menu:
.
Now depending on the image at hand you will have a few adjustment options.
RELATED: Working with Layer Blend If Sliders in Adobe Photoshop
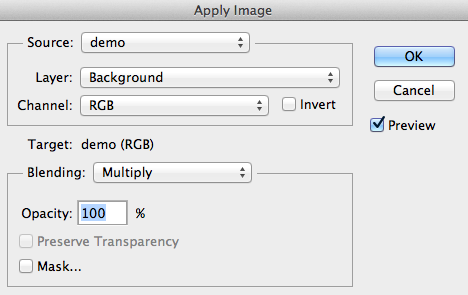
TO ENHANCE LIGHT INFORMATION DETAIL
With this particular adjustment, you are darkening the image, specifically targeting the highlight detail within the image.
Change the blending mode in the Apply Image dialogue box to Multiply.
.
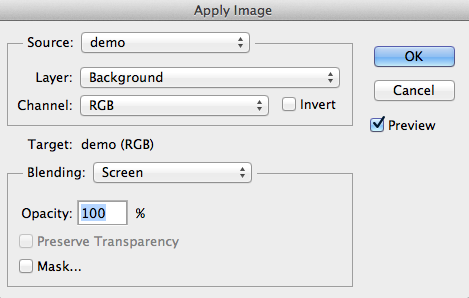
TO ENHANCE DARK INFORMATION DETAIL
With this adjustment, you are lightening the image, targeting the shadows in the image.
Change the blending mode in the Apply Image dialogue box to Screen.
.
TO ENHANCE CONTRAST
With this adjustment, you are darkening the shadows and brightening the highlights, in other words, adding contrast. Change the blending mode of the Apply Image dialogue box to Overlay or Soft Light, depending on how much contrast you wish to introduce.

.
Additional Notes
- You can apply each or some of these adjustments as separate layers and then selectively mask out the areas where you wish those specific effects to be shown. For example, for the image above, I used two Apply Image layers for the highlights and one for contrast. This is a simple, yet very effective way for adding contrast to your image.
- The greatest thing about this method is that you can introduce contrast without the side effect of creating banding!


Very interesting but at the moment I cannot see how this is beneficial over using a curves layer. Is there a benefit I am missing or is this just another way to darken/lighten an image?nThank you. Keep them coming! 🙂
The greatest thing about this method is that you can introduce contrast without the side effect of creating banding! – that is, I’d say, the main benefit of this method.
I got the same results from creating a curves adjustment layer and just changing the blend mode to any of the modes you discussed above, but the one advantage was that it didn’t increase the size of the file. The results looked identical to me, although I may be missing another advantage of apply image method that isn’t apparent to my simpleton mind. Which is why I guess my wife calls me Hodor.nnThanks for the great info on this site!
Thank you!nMy comment would be exactly the same as the one below – banding is what you’ll avoid with this method. While it might be not apparent in the image you have just tested your own method with, it doesn’t mean that it’ll work perfectly with every single image you work with in the future.nnI personally believe it is smarter to get into the habit of using a method that will deliver best results every time, and not depending on the image.
You should not experience any more banding with a flat curve–a flat curve is exactly the same as copying the image and putting it on the blend mode (or using apply image) You would, however, possibly introduce banding if you add points(gradients) to the curve.
I don’t see the advantage to this method since you cannot adjust the opacity or blend mode after the fact.