
Adobe Photoshop CC 2015 recently released their 5.0 update which brought us a revamp of the already useful tool formerly known as Refine Edge. Let’s look at what’s new and how we can take advantage of this new update to an already great feature.
What does it do? Well, Select and Mask creates a layer mask from a selection with various output options. If this sounds really simple, it’s because it is. The cool thing about it is that we have options built into this tool to refine our selections for optimal precision and accuracy.
We can access Select and Mask from the Options Bar when using any of the Selection tools, or in the tools bar “Select > Select and Mask…”, or via the keyboard shortcut “Alt + Ctrl + R”
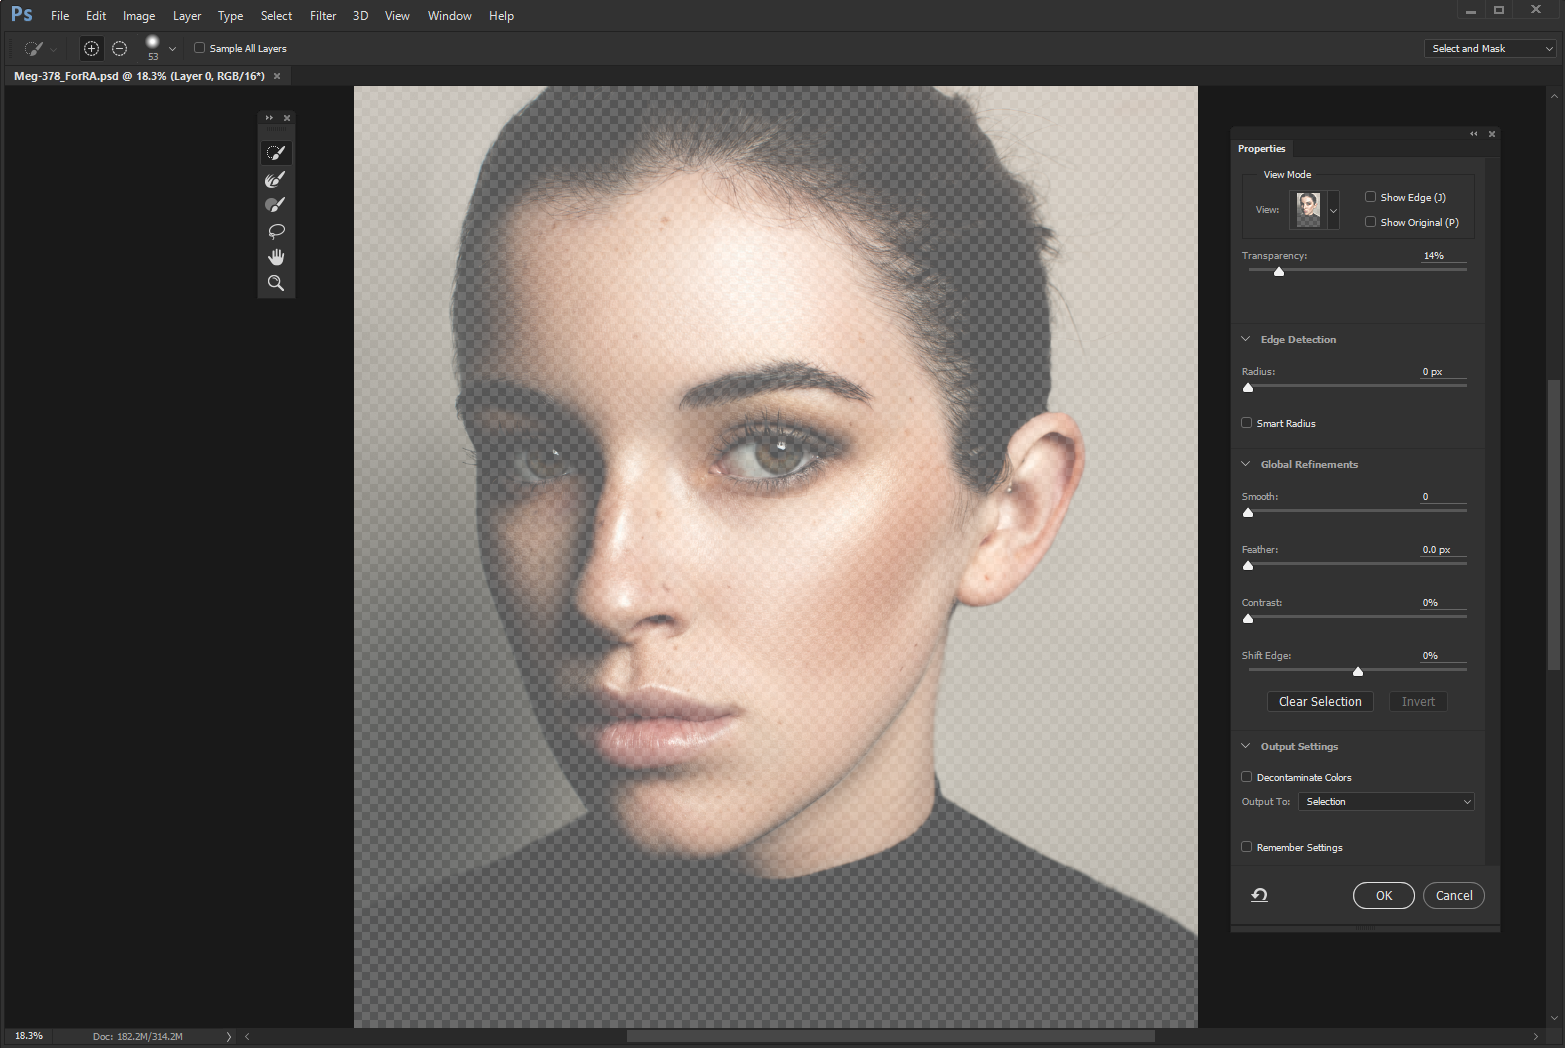
Once open, the Select and Mask becomes its own new workspace within Photoshop. This is similar to what you would do when using the Liquify tool. Within the Select and Mask workspace, we have a left hand Tool bar with the Tool options up top and a right hand Properties panel.
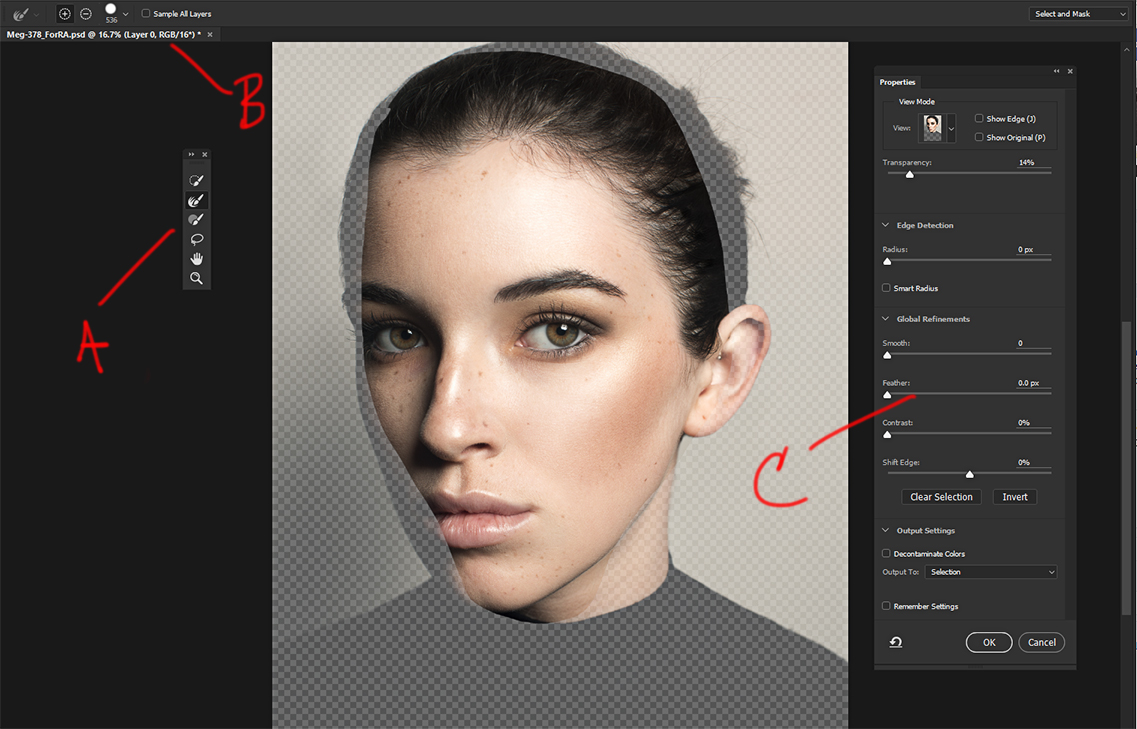
A: Tool Bar B: Tool Options C: Properties Panel
Tool Bar
The Tool bar consists of six tools that we can use the refine our selections:
- Quick Selection: Creates a selection based on similar pixels and edge detection (though not as accurate as Refine Edge Brush)
- Refine Edge Brush Tool: A Brush with Edge detection capabilities.
- Brush Tool: Creates a Selections by painting with a Brush.
- Lasso Tool: Creates a selection using the freehand Lasso.
- Hand Tool: Allows us the ability to move around our image.
- Zoom Tool: Allows us to magnify the image.
RELATED: Selection Tools Overview
All of these tools work just as they would outside of the Select and Mask workspace with one exception – the Refine Edge Brush tool, which only exists in this workspace.
The Tool options allows us to add/subtract and adjust our brush size and shape.
Properties Panel
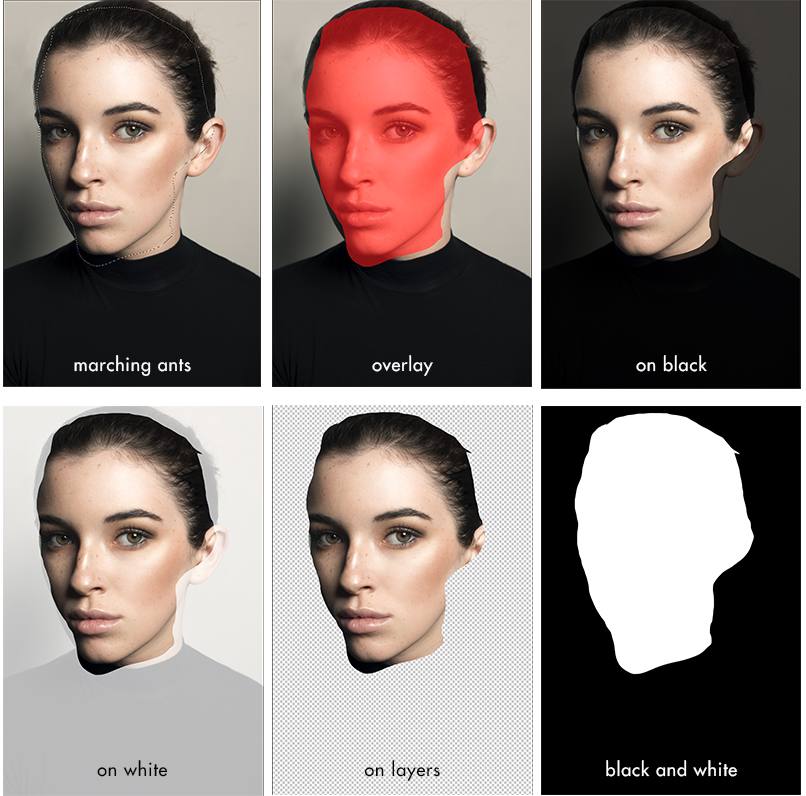
This Properties Panel, on the other hand, consists of several ways to further refine and manipulate our selections. The first item you will notice at the very top is View Modes. This gives us seven ways to view our selections, helping us to visualize the work we are doing when refining our selections.
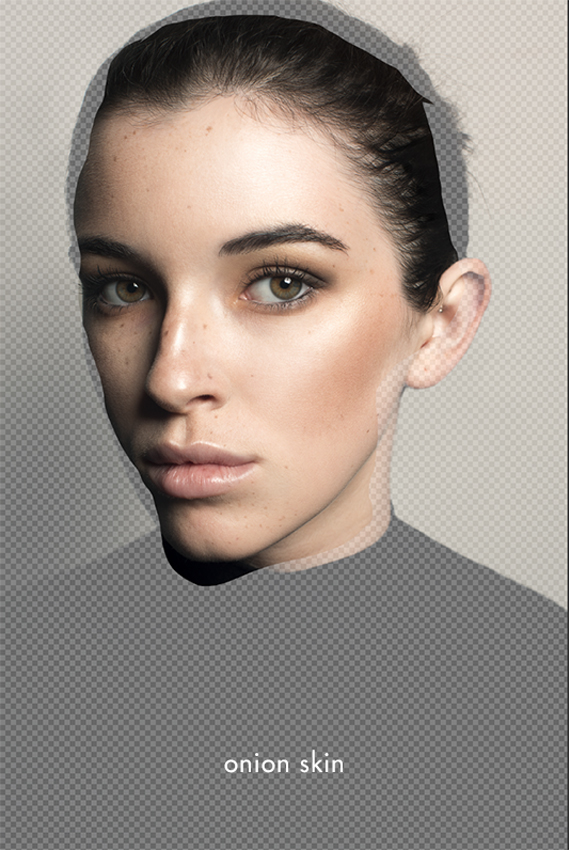
- Onion Skin (O): This is the newest of the View Modes available in the most recent update for Photoshop CC 2015 v 5.0 users. Working in this view mode brings a new animated layer style, so that viewing the selection masked with a transparency.
We also have the following six View Modes from which were present before the update in the former Refine Edge tool.
- Marching Ants (M): View the selection with a surrounding border of marching ants.
- Overlay (V): View the selection with a defined color overlay (default red).
- On Black (A): View the selection on a black background.
- On White (T): View the selection on a white background.
- Black & White (K): View the selection as a Layer Mask.
- On Layers (Y): Surrounds the selection with areas of transparency.
Press keyboard shortcut “F” to cycle each view mode and “X” will disable all modes. There is also the options “Show Edge” which simply shows the refinement area and “Show Original” which shows the original selection. Some view modes also have either a Transparency or Opacity which helps for better visual and sampling reference when refining our selection.
Essentially, all these View Modes are ways in which we can visualize our selection to help us in our refinement process. We can add or subtract from our selections using our Selection and Brush tools. Let’s take a look using the Onion Skin View Mode. For the sake of brevity, we’ll only look at the Onion Skin View Mode, but I encourage you to experiment with all the View Modes in order to better familiarize yourselves with them.
As you can see from the above animation, I have intentionally made a pretty poor initial selection using the Selection tool, now I’d like to refine it using Select and Mask.
Using the Refine Edge Brush tool in the Onion Skin View Mode, we can paint in the area that I want to expand our selection to. The Refine Edge Brush tool is using the base transparency layer to figure out how much more to add or subtract to our selection. This works pretty amazingly if you ask me. I’m quite impressed with Adobe with regards to this new update.
We can also do the same thing while using the Quick Selection and Brush tool, but they don’t seem to work nearly as accurately when edges are a concern.
It should be noted that working with Select and Mask while in 16-bit mode could negatively impact system performance. We can get around this by temporarily dropping down to 8 bit mode, then reverting back up to 16 bit mode once we complete our task. This is done in the Menu bar by selecting “Image > Mode > 8 Bits/Channel or 16 Bits/Channel” respectively.
We can further add refinement and precision to our selection process by adjusting the following options which are also located in the Properties Panel.
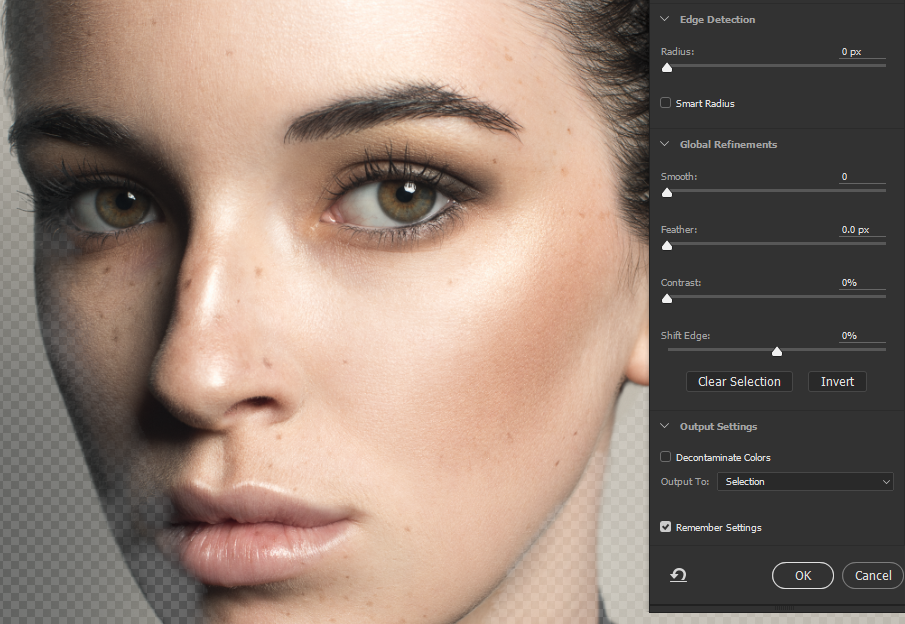
Edge Detection
Radius: For sharp edges use a small radius, for soft edges use a larger radius.
Smart Radius: Automatically adapts the radius to the image edges.
Global Refinement
Smooth: Creates a smoother outline around the selection border.
Feather: Creates a better transition between the selected and unselected pixels.
Contrast: If this is increased the edge transition becomes more abrupt, according to Adobe, the Smart Radius and Refinement tools are much more effective.
RELATED: One-Click Subject Selection Is Here and It Is Glorious
Output Settings
Once we are satisfied with our selection, we can choose our output method between the following – Output to:
- Selection
- Layer Mask
- New Layer
- New Layer with Layer Mask
- New Document
- New Document with Layer Mask
There is also the checkbox which lets us select whether or not we want to Decontaminate Colors. This will attempt to fix any color fringing issues (also known as Chromatic Aberrations) and replaces them with similar pixels nearby to correct any issues it finds.
Finally, we have the option to Remember Settings. When checked, this will save all our properties setting for the next time we need to use the Select and Mask tool. In my experience, I rarely change my settings very much as the types of selections which I need to create are generally all pretty similar.


Hi there, Thank you so much for photoshop Selections tutorial.
A great gift from Adobe! Found that unique gift as stood by reducing my time and cost. 🙂
I agree! 🙂
I am really lucky. Thank you for your learning tips. I am a photo editor. And your post help me to retouch photos perfectly. As soon as possible I will start learning for retouch photos professionally.
Thank you! That’s so wonderful to hear!
An excellent tutorial, very clear and a fantastic outcome, thank you very much.
Glad it was able to help you!
Hello,
Gerry Kingsley,
I’m a graphics designer, always I find good tutorial about Photoshop in online, it’s that one I search for and I think it’s also necessary for any other Photoshop learner. Actually, your easy presentation and clear concept as well as gif video screen short make me relax to do any retouching works in Photoshop. keep it up, I come back again. Anyway, Thanks for your awesome tutorial.
Thanks, glad to hear it! 🙂
Could never trust automatic selection. Will see if it got any better.
Photo mask is a advance level tutorial . This post is very useful . If i think , can i ask you more about this ?
I know this website gives quality based posts and other material,.. Keep on posting!.. http://greenappleimages.com/
Your Article/tutorial is very good.I am a photo editor.So its very help me your retouching blog
Thanks for sharing this amazing tutorial. I have learn a lot.
Every point over here shown in a very nice way. After long days i found very eminent content where include lots of learning material. Best part in here gif images are included which is made this post so easy to understand. Especially for the beginners this post can be very useful. And another thing is extra ordinary presentation, thanks for sharing with us.
Thanks for the comment, glad you found this helpful! Cheers!