As any resourceful retoucher would know, there is a strict low tolerance towards over-blurring in the high-end retouching community. On online forums where retouchers post their work for online peers to critique and advise, I come across some good-intentioned retouchers giving advice to “never use the Blur tool”, or the Blur filters.
While the objective is, of course, to guide the novice retouchers, a problem arises when someone takes the advice literally and avoids the effect all together.
It is important to note that no tool is inherently “good” or “bad”, but instead it is the manner that you use it. Checking the need for selectively blurring aspects of an image is a crucial step in ones workflow.
Below is an example of improper use of the Blur tool or Blur Filters:
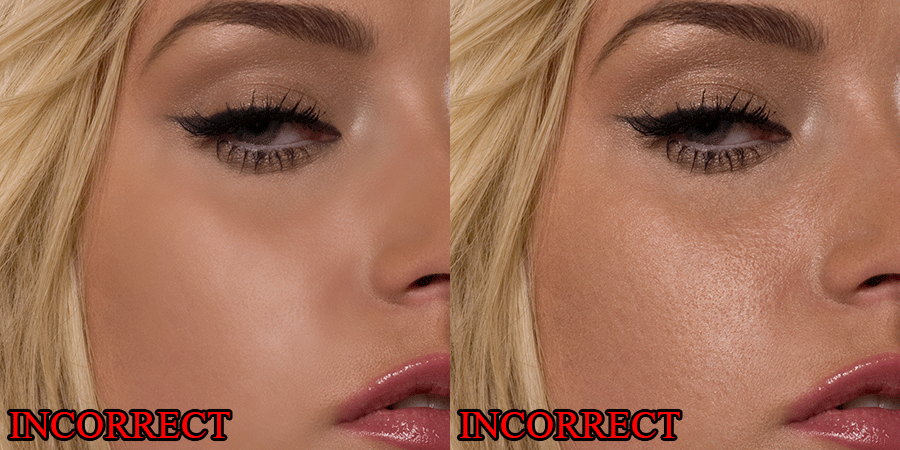
While the skin appears smoother, the overall look is plastic or porcelain-like, and should be avoided, unless, of course, this is the effect you are trying to achieve. Instead, try Dodging and Burning to smooth the skin while maintaining a sense of realism.
RELATED: Retouching Skin with Dodging and Burning
Here is an example of proper use of blurring:
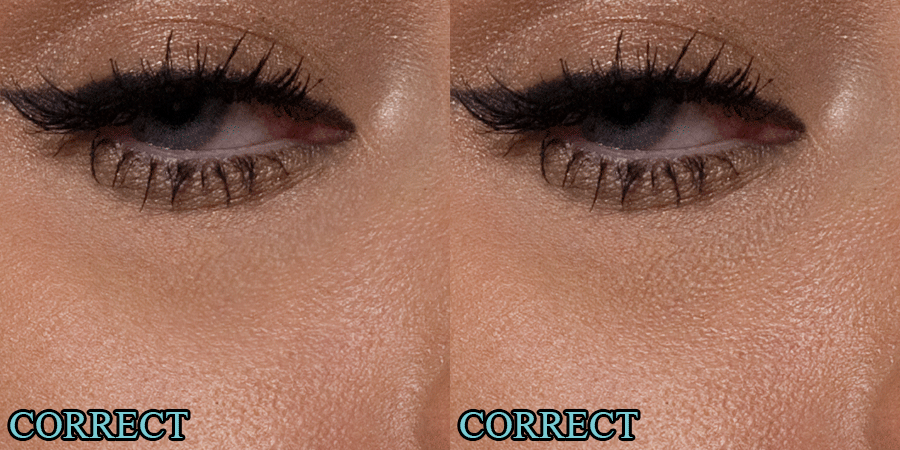
After one finishes Dodging and Burning in their workflow, there may be inconsistencies in the amount of detail in the skin.
Selectively blurring (and in some cases sharpening) in order to even out the right details is a crucial step to producing a finished retouch, and is a great example of when it is perfectly acceptable and even encouraged to blur aspects of one’s image.




So how does one correctly use the blur tool as shown in the correct image?
Is it just using the blur to to an acceptable level for each individual part of the face and then using opacity and layer mask (on the blur layer) to paint in the places where you want the blur? How was the correct image shown above achieved?
Sreejit, there are dozens of ways to achieve almost any result in Photoshop. It doesn’t matter how, especially in this case, the concept is what this is about. You can make a selection and take a part of the skin you want to blur to a new layer, blur it there, then adjust the Opacity of that layer. You can duplicate a layer, blur it, cover with a black mask and then uncover just the part you want to be blurred (in this case you’ll have extra data that isn’t necessary and it will make your file larger).. You can also use the Blur tool, or the High Pass (then invert it) to blur the parts you need… so again, how – your choice, the concept is what matters here.
Thanks for the reply 🙂
Definitely need to look into the inverting High Pass technique for blurring!