
With recent updates to Photoshop and Lightroom CC, Adobe has rolled out new features for detail enhancement that are worth exploring. Each of these features function differently, and today’s video tutorial will show you a deep dive into the mechanics behind each option, while demonstrating the best method for applying these changes precisely.
The misconception surrounding Sharpening, Texture, Clarity, and Dehaze, is that they are capable of adding details back into a photograph. However, all they are able to do, at a technical level, is increase the contrast of specific frequencies, to enhance the edges of said frequencies and give the illusion of added detail.
Frequencies are described as how often tone changes in a given area. High frequency will have a lot of tonal changes within a smaller area of an image, while low frequency will not. With that in mind, be aware that going too far with these sliders can add too much noise or contrast, so a subtle touch goes a long way.
RELATED: Simplifying Skin Retouching with Frequency Separation
You can test and practice these new features using the Camera RAW Filter in Photoshop, and once you grasp how they operate, it’ll be easy for you to know how to use them in Lightroom CC and Lightroom Classic.
To practice, you can convert your image to a Smart Object. This will allow you to work non-destructively, and you can revert your changes if necessary.
Once a Smart Object is created, navigate to Filter > Camera RAW Filter. Within this new window, you will be able to apply Texture, Clarity, and Dehaze within the Basic Panel. You can click on the Detail Panel to reveal Sharpening, which is one of the more classic options.
Below I will describe each tool and its functionality.
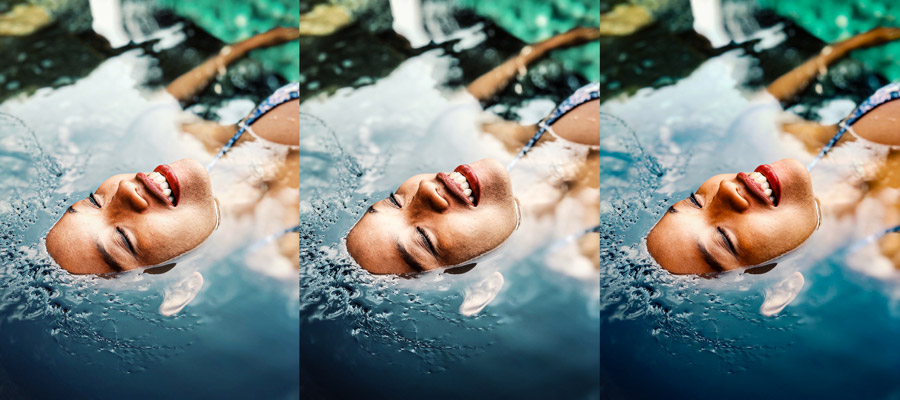
Left: Texture at 50% | Middle: Clarity at 50% | Right: Dehaze at 50% | Image Source: Unsplash
1. Sharpening. This has been a staple detail-enhancing option within Photoshop and Lightroom for ages. This tool increases the contrast and visibility of edges throughout the entire tonal range of your image. If you zoom in at 100% to your photograph, you’ll see that a high amount of Sharpening results in a lot of visual noise, giving the “sharper” appearance when zoomed out. We highly recommend using the Masking feature, so you can apply this tool to the edges of the image, rather than the entirety of it.
2. Texture. This is the new kid on the block, and increases the contrast in mid-frequency areas. This option is perhaps the most “natural” of the rest due to this, and performs well with skin.
3. Clarity. This option packs a punch, and while it does increase the contrast to the midtones of the image, it does alter saturation minutely as well. This one is often visually harsher than the others, so a little goes a long way.
4. Dehaze. This one is also slightly newer, and increases contrast and saturation moderately. The intention is to remove haze, so this option is only sensible when you factor in the drastic changes to the colors within the picture.
Regardless of which tool you use, the best way to apply it is by using the Adjustment Brush within the Camera RAW Filter (you can tick the Mask box to give you a visual aid while doing this). This way you can paint in the areas you wish to add the effect to, for optimal precision when making your images appear tack sharp.
Watch the following video by the Photoshop Training Channel to see these tools in action.
Source: Photoshop Training Channel | Featured Image: Shutterstock