

In order to become a skilled retoucher, it is vital for every artist to recognize when they’ve gone too far with their retouching, and what mistakes to watch out for.
Training your eye to discern the differences between quality retouching and visually poor retouching should be one of the first steps on your journey. Below, we will discuss six aspects that can greatly impact the quality of your retouching.
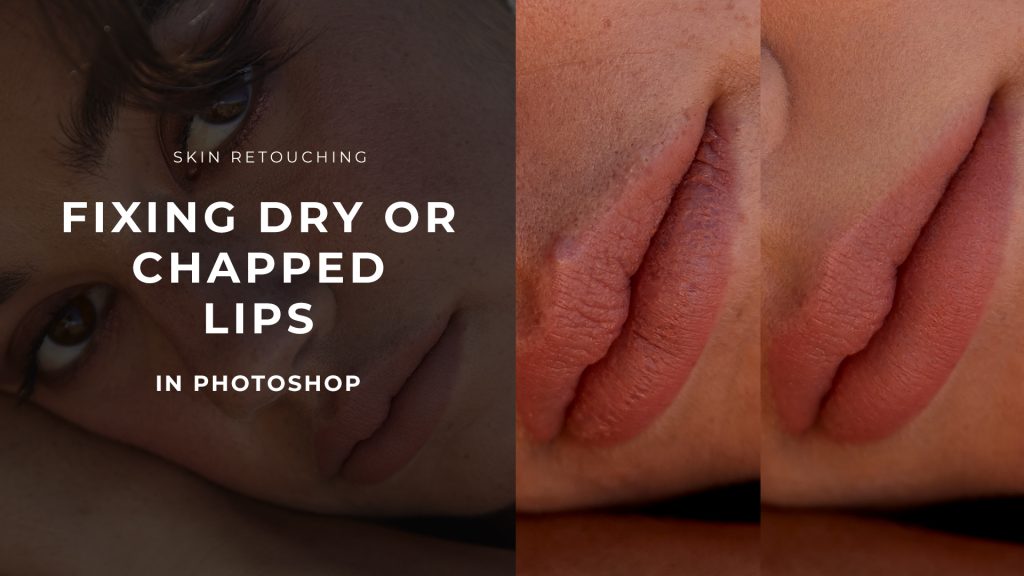
1. Skin Texture is Key
Skin retouching typically comprises the bulk of the time that we spend while retouching a person, and it is often the key aspect that can make or break the image. The physical visual properties of skin can vary drastically based on a host of factors: skin tone, size of pores, visibility of facial hair, blemishes, freckles, moles, wrinkles, lines, surface texture, etc.
Skin also varies in appearance on different areas of the body, with differences in texture, hair thickness, pore size, how incidental light reflects, and tone.
A little bit of anatomy knowledge goes a long way when producing a quality retouch of skin, as it can help train the eye to recognize once the appearance of skin has slipped into overly soft or overly blurred territory.
In most cases, when skin doesn’t look right in a retouched image, it’s because it has lost texture, leaving nothing but the skin tone and reflection of light on the skin. Pores vanish, hairs blur together, and in an effort to make skin appear desirably smooth, your subject has been rendered into plastic.
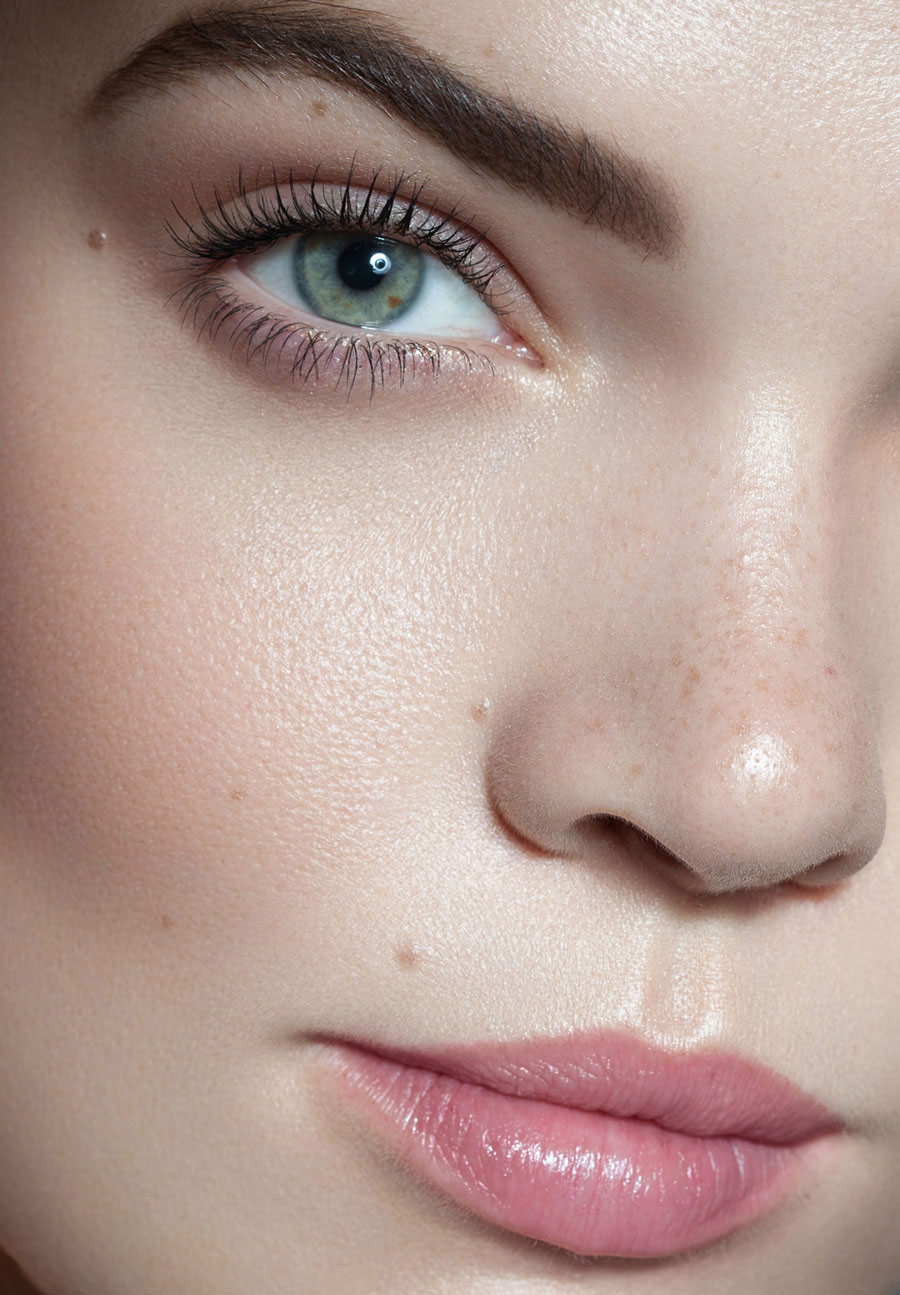
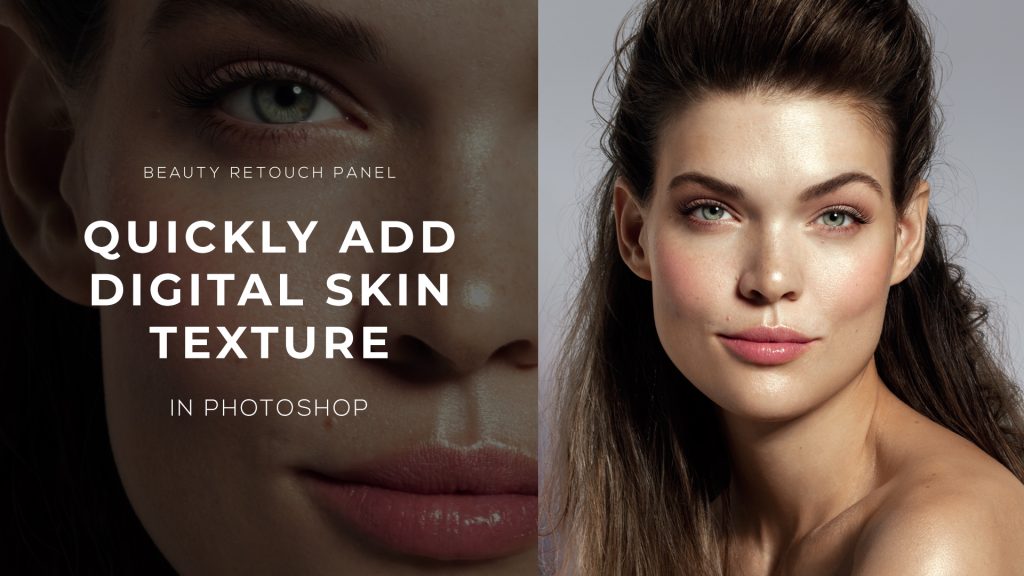
This image by Julia Kuzmenko demonstrates beautiful skin detail throughout.
It’s important to also consider the lighting the skin was captured under, as skin will photograph differently under direct early afternoon sunlight, or a high-contrast lighting modifier, or a softbox, window lighting, and other lighting situations.
The detail that is rendered in the skin will also vary depending on the camera settings, such as focal length, distance to subject, aperture size, and potentially shutter speed.
Some setups will soften skin texture, while others may carve out textures noticeably. If an image was captured outdoors during golden hour with a large aperture opening, then over-sharpened, rough, “crispy” skin in post may appear unrealistic, when compared to a studio portrait captured with a beauty dish that might call for more detail.
Skin texture is important, if perhaps the most important aspect of retouching, so take your time to really understand the anatomy, and perfect your technique for flattering believable skin.
2. Eyes & Teeth Should Not Lose Realism
Eyes can arguably be the most magnetic aspect of portrait, beauty, and fashion imagery. They often allow the viewer to really connect with the subject, but can easily become a distracting element if overdone. Visually, we recognize three main components of the eyes: the pupil (the black center opening, like an aperture), the iris (the pigmented area of the eye), and the sclera (the white part of the eye).
RELATED: How To Brighten Eyes Naturally in Photoshop
Catchlights are often recommended for breathing life into the eyes and should be paid attention to. Major common mistakes with the eyes, however, are often the iris and sclera becoming overdone in retouching. The iris should not be overly saturated with color, nor should it appear to glow due to intense dodging. If dodging is performed to the iris as a whole, without purposeful brushstrokes focusing on the ciliary and collarette areas of the iris (the fiber-like parts), then the eyes begin to look animated, in an undesirable cartoon-like manner.
When it comes to the white area of the eyes, the sclera, we often associate healthy eyes with its brightness. While this is true, it’s easy to go too far very quickly, causing the sclera to appear more akin to card stock than to an eyeball, or something resembling 1% milk.
The same can be said of teeth, as over-whitened teeth in post can lose texture or realistic hues. If you paint teeth over with a perfect white, versus a color with a slight yellow tint to it, teeth will often look gray and unappealing.
Lighten them when needed (dodging or using masked curves adjustments), and digitally bleach them as you like, but look out for when teeth start to glow strangely or look unhealthy.
View this post on Instagram
There are a host of ways to retouch eyes and teeth beautifully, in order to highlight their color and details, so it’s merely a matter of finding the technique that fits with your workflow. The key takeaway is to learn what looks aspirational, versus bad CGI.
There are a couple of helpful scripts on our Beauty Retouch panel that will help you quickly brighten and color correct teeth and eyes in your images – Magic Eyes and Magic Smile – but all of the mentioned above notes apply when you’re using them as well.
3. Think In 3 Dimensions
This retouching flaw is often a nasty sidekick to incorrect skin retouching, but the issue at hand is when an image becomes too flat, as though everything exists on the same plane. This becomes particularly apparent when it comes to retouching makeup, as eyebrows can become sticker-like, with lips suffering a similar fate.
Whether it is makeup details on the face or your subject’s limbs, pay attention to how shadows appear in your final product. Is there a noticeable separation between the subject and the background? Do the lips and nose appear to protrude appropriately, or do they lack in shape?
Reference the original photograph, and ensure that the depth that has been added or subtracted has led to a 3-dimensional appearance.
4. Watch Out For Overly Distorted Shapes
This is the step that will often draw the ire of fashion and beauty bloggers the world over. When a model or celebrity has their physique heavily manipulated, the before and after imagery can make retouchers easy targets. While clients may request that subjects are slimmed down or enhanced if the final result ignores all laws of physics and anatomy, most viewers can tell something is off.
This is not just limited to the body below the neck, as many retouchers manipulate the size of the nose, eyes, and mouth with the liquify tool. When done haphazardly, those overly manipulated features can confuse viewers, or degrade the aesthetic of the photograph.
As recommended for retouching skin, learning about anatomy is important when it comes to realistically manipulating physiques. Jokes are often made about missing knuckles, knees, and ribs in badly retouched photographs, but it is surprisingly common.
Don’t be another perpetrator of bad Photoshop plastic surgery.
5. Improper Colors, Saturation, & Contrast
When using any sliders within applications like Lightroom or Capture One, you have the ability to add a little or a whole lot. Taking the saturation slider from 0 to 100 will turn most skin from a realistic tone straight to Cheetos orange. Color grading can absolutely be stylistic, but when colors are too vibrant or saturated in instances that do not call for it, the overall appearance of the photograph will be downgraded.
Improper color management can shift colors, remove detail, add visual distractions, or change the intended mood and feel. A high-key portrait that is color graded with green or blue highlights to the skin may make the subject appear sickly, while overly warm tones can cheapen the effort spent on improving skin detail:
Photo: Kendra Paige | Model: Megan Coffey
Correcting or changing the exposure, particularly with utilizing contrast in the example above, can also have adverse effects. If the transition from highlights to shadows leaves no room for mid-tones, that issue we mentioned earlier about a lack of dimension is right back in the overly contrasted limelight.
You may want your highlights and shadows to pop, but find a happy medium that won’t sacrifice depth and detail.
6. A Disproportionate Amount of Detail
Great retouching is often time-consuming, especially in beauty photography. Removing distractions on the skin, cleaning up hair, smoothing out tones and textures, and enhancing any features can take well over a couple of hours.
This can push an impatient or frustrated retoucher to spend a lot of time in one area of the photograph while neglecting others. Skin texture on the forehead and cheeks may look great, but look utterly forgotten around the mouth, or on the neck and shoulders.
The eyes may be immaculately retouched, rendering them in sharp detail, but the skin could look flaky or fuzzy. This can also manifest itself when it comes to textures, as the skin may be realistically porous, yet the eyes are blurry.
The face may be gorgeously retouched and detailed, yet the limbs appear like over-blurred creamy peanut butter. Clean skin yet untouched hair can also bring down the quality of your retouching, as the hair may become overly distracting.
If you are committed to a polished final product with your retouching, see it through. You never want to look at a published image that you retouched, and think “I could have done this, this, and that” in order to improve it.
Pace yourself if necessary, but commit to a consistent level of retouching to the entire photograph, and produce the best work that you can.
Sources: Everyday Health | WebMD | Columbia University


Gracias por este aporte, siempre estoy al pendiente de este tipo de información ya que estoy en constante aprendizaje para mejorar mi retoque, nuevamente gracias y bendiciones.