
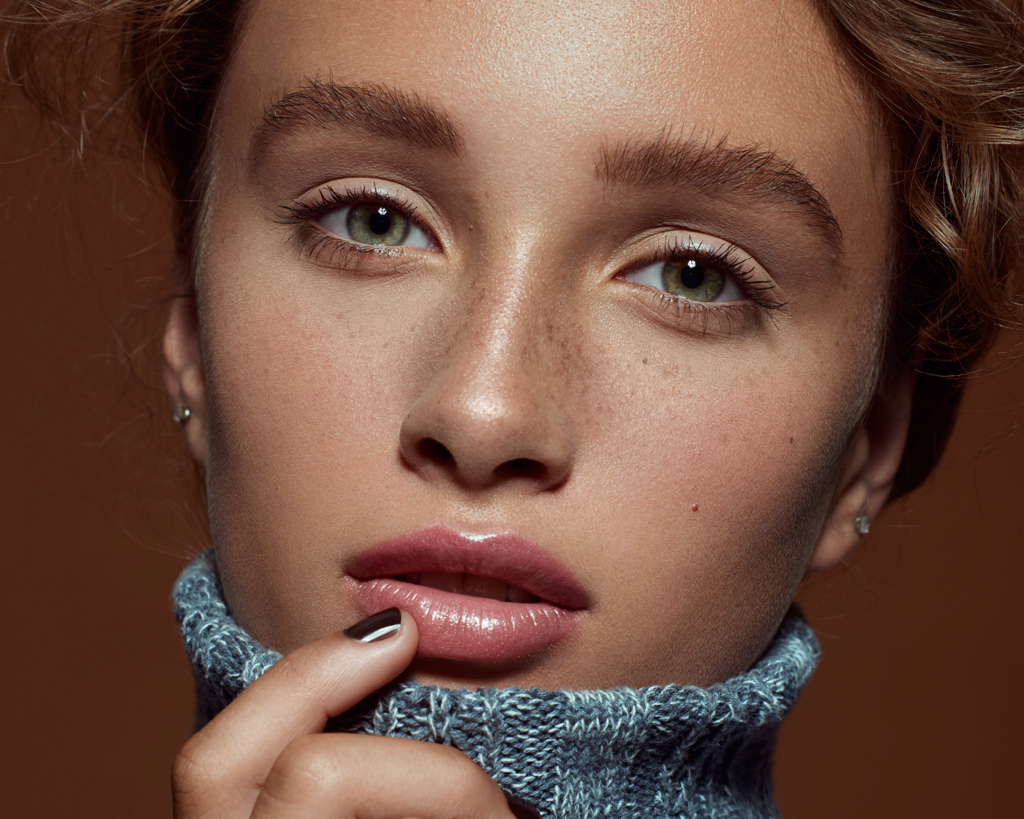
What do we call “peach fuzz”?
Otherwise known as vellus hair, those are the fine, light-pigmented hairs on the face, neck and other parts of the body. Usually so fine, that they can be noticed only in extreme close-ups or under certain light. While in many cases peach fuzz compliments the texture of the skin and enhances the natural feel of the image, sometimes you may find it distracting, and hence decide to address that in your post-production.
In my experience, for most of the images reducing the peach fuzz visibility is enough and it should rarely be removed altogether, but that, of course, depends on many factors including your own aesthetics.
RELATED: A Fast Way To Remove Stray and Body Hair
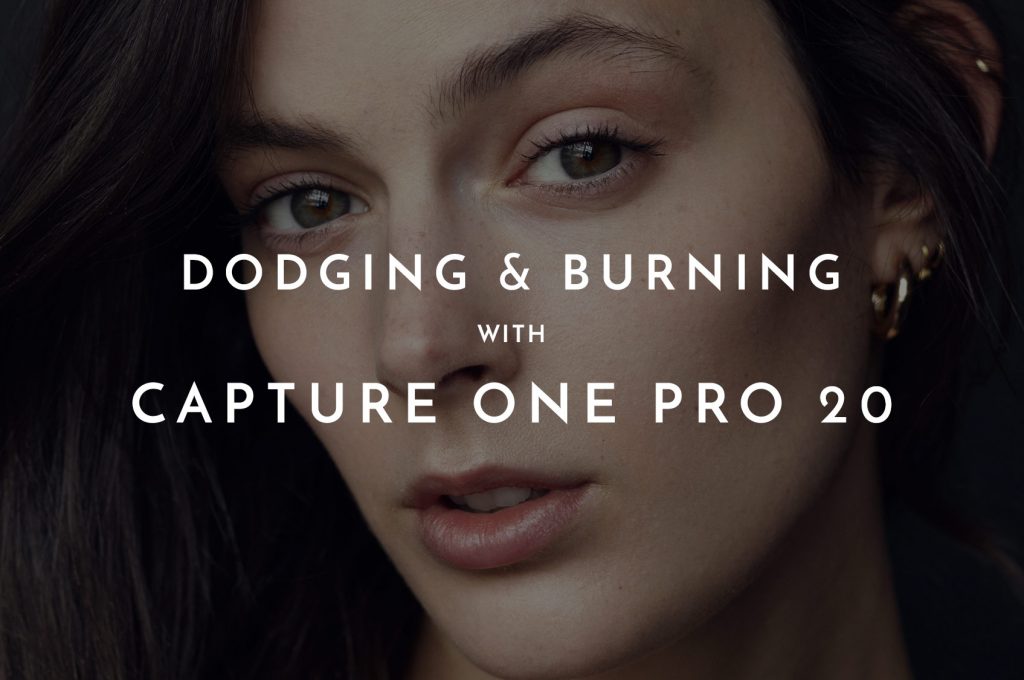
For the purpose of this tutorial, I will be working on a beautiful photo shot by Michael Woloszynowicz and try to slightly reduce the visibility of peach fuzz on the model’s cheeks.
The workflow will consist of two parts and the intensity and amount of time you spend on each of them purely depends on your desired result.
1. Cloning
Since the peach fuzz is visibly lighter when compared to the skin, we will start by removing the most prominent hairs with a Clone Stamp in darken mode:
- Create a new blank layer and set the blending mode to Darken.
- Next pick your Clone Stamp tool, set its blending mode to Darken as well, and 100% Opacity. Choose the hardness you are comfortable with. Since we will be working with a very small-sized brush, I usually go for 70-100% hardness.
- Now start removing the hairs that stand out the most. Don’t try to stay in one place for a long time, cleaning everything out perfectly, rather move around the area, picking each time the most prominent ones.
As you will notice, the Darken blending mode allows us to cover up the hairs, while leaving the areas around them mostly untouched.
2. Dodging and Burning
After removing the most bothersome hairs move on to the next step – dodging and burning the area.
My preferred method is a Dual Curve setup – one Curve for dodging and the other for burning. This gives you extra flexibility for correcting the shifts in saturation, which is a definite boon.
- Pick your favorite brush for D&B and set a really small size since you are going to be addressing very fine lines. You will mostly be burning the hairs themselves as well as an occasional light spot.
- Use a visual aid (additional layers that help you identify the issues) if you feel like you need one – if you are a RA panel user simply click the “Visual Aid” button. If not, create a 50% gray layer set to Color blending mode and a Curve to add extra contrast. While working on this image I felt like I didn’t need any extra eye help, since the hairs already stood out against the skin well.
- Once again, try not to stay on one spot for too long, move around the area burning the brightest hairs. Try zooming out every once in a while and checking how the area blends in with the rest of the texture.
Quite often you may encounter saturation shifts after commencing D&B. This happens because shadows are generally more saturated than the mid-tones or highlights, so the areas you dodged will be more “intense” in regards to saturation, while the areas you burned more greyish.
This can be easily solved by clipping a Hue/Saturation adjustment layer to each of your Curves. You will need to reduce some saturation on the adjustment you clipped to your Dodge Curve, and add some to the adjustment clipped to Burn Curve.
RELATED: Retouching Skin with Dodging and Burning
This works very well with the Curves as a tool of choice for Dodging and Burning since the Saturation adjustment will only be affecting the areas you painted on your Curve mask. In case you were using a 50% gray layer, you will need to manually target the areas affected, concealing the rest of the layer with a black Layer Mask.
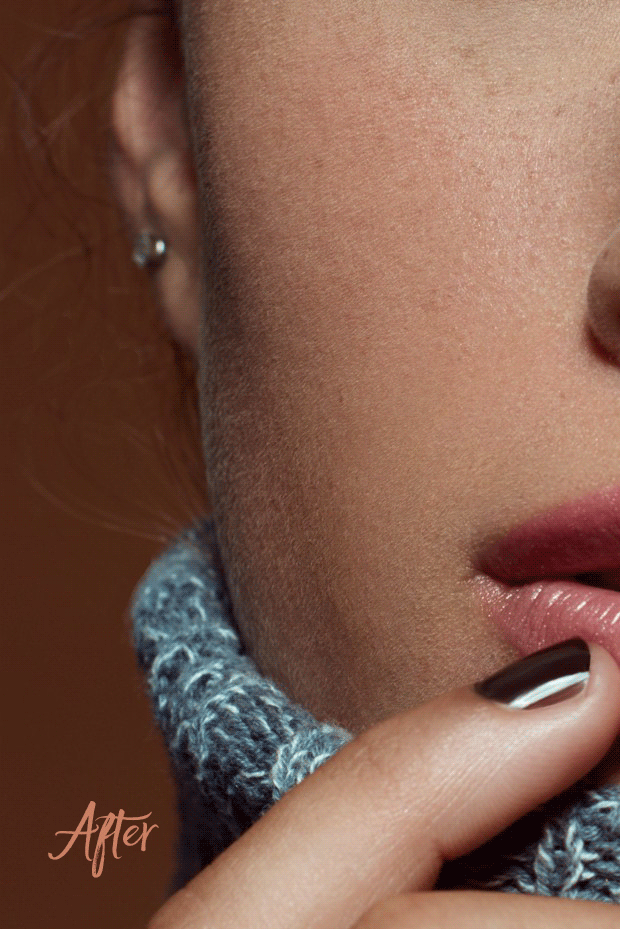
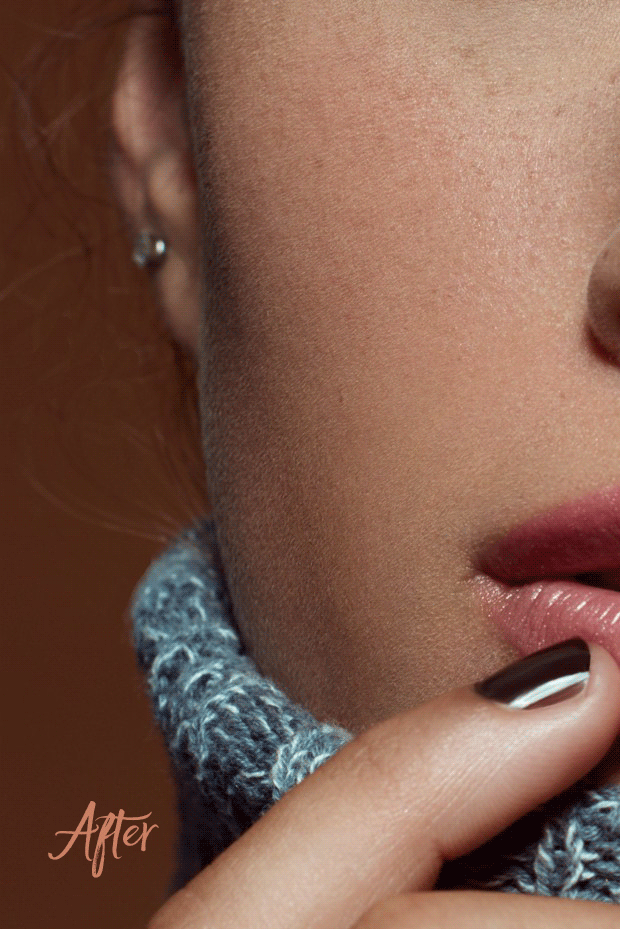
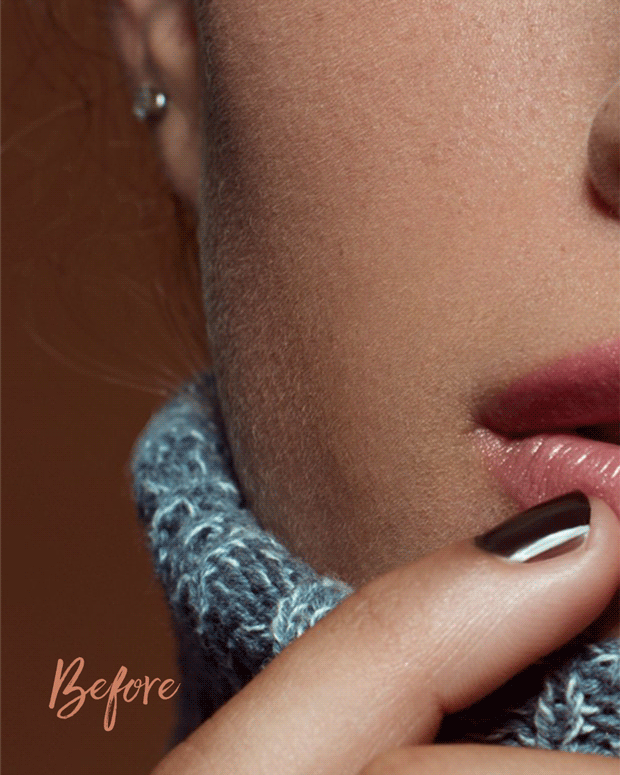 These two steps constitute a basic way of reducing peach fuzz. It is completely up to you, how far you want to go with this, but try to keep in mind the purpose of the image: it might not be wise to spend time micro dodging and burning something, that will not even be seen due to a large crop and web size.
The beautiful image is courtesy of Michael Woloszynowicz photographed exclusively for Retouching Academy. Learn to master the Dodge & Burn technique with Michael:
![]()


Thanks for the tips! The before/after links aren’t working for me. Is there any way to show this with a brief video example?
Hello Vara,
Please try a different browser, the before/after links are working fine on our end and we have not received any reports that they don’t work for anyone else. Unfortunately, we do not have a video.
They work for me !
hello julia
i am facing the same. can’t see before and after link
Hi Rahul,
It’s very strange, the plugin keeps shutting them off – I just fixed it the other day, but I see that they are not working again 🙁
i hope u will fix this soon. and i want to say big thank you for online courses 🙂
It’s our pleasure!
And I have cleared cache and it’s working now – if you clear cache in your browser you should see it too 🙂
Hi Julia,
unfortunately the before/after images don’t work on iOS (iPad) at all. Also on other pages of your website. I recommend to update your website software to fix this.
Hi Tom,
Thank you, yes we’re aware. Unfortunately, there are only a couple of decent Before/After plugins that are available for WP and even they are far from perfect. We’re looking for other ways to display B&A, but even if we use GIF images not all mobile devices will display them either 🙁
Did you change anything? It works now on my iPad!
Oh yes, thank you Tom 🙂 After you alarmed us on the issue, we have changed the plugin and the coding for the before & after pictures across the entire website 🙂 Thank you again!